为了提高代码设计水平,测试是必不可少的。jest是facebook出的一个测试框架,里面自带断言库,而且VUE有个Vue Test Utils提供了官方支持,因此这里使用jest构建VUE单元测试部分。开始前建议先浏览一下官方网站,进行初步了解。
起步
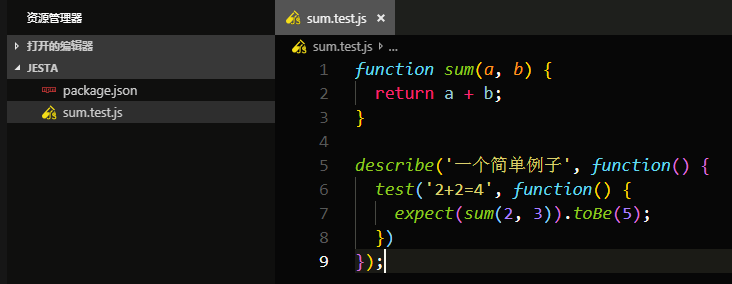
安装&简易demo
新建一个文件夹,然后执行:
1
2
| npm init
npm install jest -g
|
这就安装好了,接下来写一个简单的函数:
然后在你的项目文件夹下执行jest, 就会自动搜索所有.test.js和.spec.js文件进行测试。
增加配置
接着我们改一下目录,增加一个SRC文件夹,里面放着我们的原文件,然后新建test文件夹,将测试文件全部放进去

在demo.test.js中添加代码:
1
2
3
4
5
6
7
8
|
import checkNumber from '../src/demo/demo';
describe('decribe用来生成一个组', () => {
test('checkNumber', ()=> {
expect(checkNumber(2, 3)).toBe(5);
});
});
|
这时直接运行会报错,因为默认不支持ES6的部分语法,所以需要安装babel(注意babel的版本)进行转译:
1
| npm install @babel/core @babel/preset-env babel-jest -D
|
在根目录新增babel.config.js
1
2
3
4
5
6
7
8
9
10
11
12
13
|
module.exports = {
presets: [
[
'@babel/preset-env',
{
targets: {
node: 'current',
},
},
],
],
};
|
并且在package.json中配置好入口文件
1
2
3
4
5
6
7
8
9
10
11
12
13
14
15
16
17
18
|
{
"name": "jestdemo",
"version": "1.0.0",
"description": "",
"main": "index.js",
"scripts": {
"test": "jest"
},
"author": "",
"license": "ISC",
"devDependencies": {
"@babel/core": "^7.4.5",
"@babel/preset-env": "^7.4.5",
"babel-jest": "^24.8.0",
"jest": "^24.8.0"
}
}
|
jest.config.js是jest配置文件,后面一些配置就在这里添加。
jest运行时会自动寻找默认的jest.config.js配置文件。如果要自定义目录,需要在package.json中指定路径:
1
2
3
| "scripts": {
"test": "jest --config ./test/jest.config.js"
},
|
执行:
得到以下结果,说明执行成功!

测试Vue组件
Vue官方给我们提供了Vue Test Utils单元测试工具,Vue Test Utils 通过将组件隔离挂载,然后模拟必要的输入 (prop、注入和用户事件) 和对输出 (渲染结果、触发的自定义事件) 的断言来测试 Vue 组件。被挂载的组件会返回到一个包裹器内,而包裹器会暴露很多封装、遍历和查询其内部的 Vue 组件实例的便捷的方法。
简易Demo
以一个简单的组件为例
1
2
3
4
5
6
7
8
9
10
11
12
13
14
15
16
17
18
19
20
21
22
23
24
25
26
|
<template>
<div>
hello {{ msg }}
<p class="text">I'm jest demo</p>
<button class="count" @click="increment">Increment {{ count }}</button>
</div>
</template>
<script>
export default {
name: 'Hello',
data() {
return {
msg: 'picker',
count: 0
};
},
methods: {
increment() {
this.count++;
}
}
};
</script>
|
添加依赖
1
| npm install vue-jest @vue/test-utils jest-serializer-vue -D
|
参考vue-cli2,修改jest配置
1
2
3
4
5
6
7
8
9
10
11
12
13
14
15
16
17
18
19
20
21
22
23
24
25
26
27
28
29
30
|
const path = require('path');
module.exports = {
rootDir: path.resolve(__dirname, './'),
moduleFileExtensions: ['js', 'json', 'jsx', 'ts', 'tsx', 'node', 'vue'],
moduleDirectories: ['node_modules', 'assets'],
moduleNameMapper: {
'^@/(.*)$': '<rootDir>/assets/',
'\\.(jpg|jpeg|png|gif|eot|otf|webp|svg|ttf|woff|woff2|mp4|webm|wav|mp3|m4a|aac|oga)$': 'identity-obj-proxy',
'\\.(css|less|scss)$': 'identity-obj-proxy'
},
transform: {
'^.+\\.js$': 'babel-jest',
'.*\\.(vue)$': 'vue-jest'
},
transformIgnorePatterns: ['<rootDir>/node_modules/'],
testPathIgnorePatterns: [
'<rootDir>/projects/',
'<rootDir>/test/sub.test.js'
],
testRegex: 'hello.test.js',
snapshotSerializers: ['<rootDir>/node_modules/jest-serializer-vue'],
collectCoverage: true,
coverageDirectory: '<rootDir>/test/coverage',
collectCoverageFrom: [
'<rootDir>/testDemo/**/*.{js,vue}',
'!**/node_modules/**'
]
};
|
写测试文件:
1
2
3
4
5
6
7
8
9
10
11
12
13
14
15
16
17
18
19
20
21
22
23
24
25
26
27
28
29
30
31
32
33
34
35
36
|
import Vue from 'vue';
import { mount } from '@vue/test-utils';
import { renderToString } from '@vue/server-test-utils';
import hello from '../testDemo/hello.vue';
let wrapper;
let vm;
describe('vue组件测试', () => {
beforeEach(() => {
wrapper = mount(hello);
});
afterEach(() => {
vm && vm.$destroy();
wrapper && wrapper.destroy();
});
it('Dom', () => {
expect(wrapper.contains('div')).toBe(true);
});
it('Content', () => {
expect(wrapper.find('.text').text())
.toEqual('I\'m jest demo');
});
it('Trigger', () => {
const button = wrapper.find('.count');
button.trigger('click');
expect(button.text())
.toEqual('Increment 1');
});
it('renderToString render component as a html', async () => {
const str = await renderToString(hello);
expect(str).toContain('<p class="text">I\'m jest demo</p>');
});
});
|
其中的API根据官方文档自行调整,配置完毕后再次运行,出现以下结果即说明测试通过:
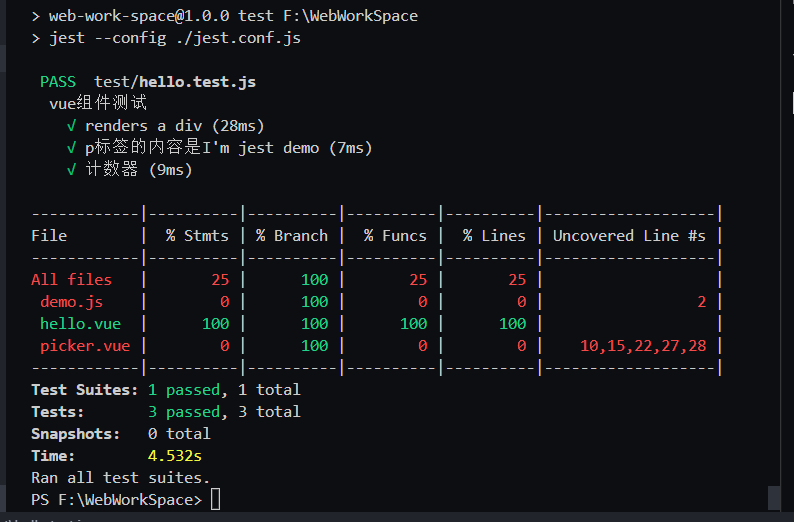
图中的表格就是我们配置的测试覆盖率。其中的几个参数意思是:
%stmts是语句覆盖率(statement coverage):是否每个语句都执行了
%Branch是分支覆盖率(branch coverage):是否每个if代码块都执行了
%Funcs是函数覆盖率(function coverage):是否每个函数都调用了
%Lines行覆盖率(line coverage):是否每一行都执行了
从图中可以看出hello.vue文件的执行率全部为100%,并且全部通过测试。说明组件逻辑计算没有问题,实际使用怎样不能确定,但是肯定没有人为的失误问题。组件测试不一定非要追求100%,有些组件其实只要测试输入输出可以达到要求即可。
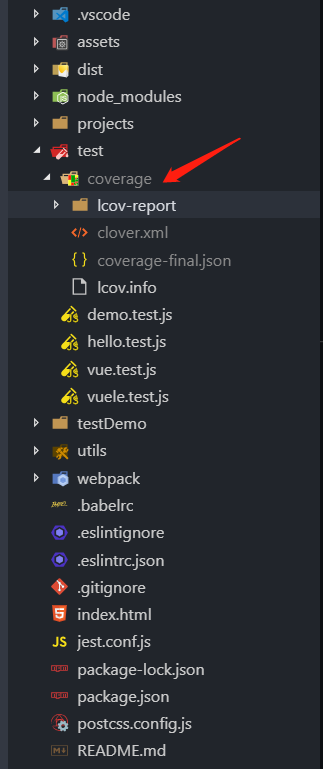
前面jest.conf.js中设置了覆盖率测试结果的输出路径(coverageDirectory)为test文件夹下的coverage,测试完成后就会自动生成:
组件挂载方式
我们要测试VUE组件,你得找个地方挂载它,这样才可以调用VUE实例的一些属性与方法。可以使用Vue Test Utils官方API创建一个包裹器wrapper,将组件挂载上去,也可以收到创建VNode,只渲染,不挂载:
1
2
3
4
5
6
7
8
9
10
11
12
13
14
15
16
17
18
19
|
import { mount } from '@vue/test-utils';
import hello from './hello.vue';
beforeEach(() => {
wrapper = mount(hello);
});
describe('hello', () => {
it('renders a div', () => {
expect(wrapper.contains('div')).toBe(true);
})
})
import hello from './hello.vue'
const Constructor = Vue.extend(hello);
const vm = new Constructor().$mount();
|
- 简单组件可以用Vue Test Utils的API,挂载时顺便将slot、propsData设置好,检测输出的结果是否符合预期。
1
2
3
4
5
6
7
8
9
10
11
12
13
14
15
16
17
18
19
20
21
22
23
24
25
26
27
28
29
30
31
32
33
34
35
36
37
38
39
40
41
42
|
import Vue from 'vue';
import sinon from 'sinon';
import { mount, shallowMount } from '@vue/test-utils';
import index from '../index.vue';
let wrapper;
let vm;
const leftSlot = '<div class="leftSlot">left icon</div>';
const left = '<p class="leftText">left text</p>'
const right = '<p class="rightText">right text</p>'
const title = '<p class="title">header title</p>'
describe('check index', () => {
beforeEach(() => {
wrapper = mount(index, {
propsData: {
theme: 'transparent',
leftOptions: {
showBack: true,
backText: 'goBack',
preventGoBack: false,
showMore: true
},
title: 'header组件',
transition: String,
rightOptions: {
showMore: true
}
}
});
});
afterEach(() => {
vm && vm.$destroy();
wrapper && wrapper.destroy();
});
it('DOM', () => {
expect(wrapper.find('.title').text()).toBe('header组件');
});
});
|
- 复杂组件可以创建一个Vue的实例对象,在这个对象里引用你的组件,调用相关的API测试结果。下面这个例子是element-ui组件单元测试创建VUE实例的方法。使用时直接将引入的组件挂在创建的实例上即可。
1
2
3
4
5
6
7
8
9
10
11
12
13
14
15
16
17
18
19
20
21
22
23
24
25
26
27
28
29
30
31
32
33
34
35
36
37
38
39
40
41
42
43
44
45
46
47
48
49
50
51
52
53
54
55
56
57
58
| const createElm = function() {
const elm = document.createElement('div');
document.body.appendChild(elm);
return elm;
};
export const createVue = function(Compo, mounted = false) {
if (Object.prototype.toString.call(Compo) === '[object String]') {
Compo = { template: Compo };
}
return new Vue(Compo).$mount(mounted === false ? null : createElm());
};
import child from '../child.vue';
it('create', done => {
const vm = createVue({
template: `
<div>
<button class="btn">a button</button>
<child
ref="autocomplete"
v-model="state"
:options="options"
@handle="handle"
>
hello world
</child>
</div>
`,
data() {
return {
restaurants: [],
state: '',
options: {
show: false
}
};
},
methods: {
handle(res) {
console.log('handle' + res);
},
},
mounted() {
}
}, true);
let elm = vm.$el;
let btnElm = elm.querySelector('btn');
expect(btnElm.text()).toBe('a button');
});
|
复杂Vue组件
这里的复杂表示组件内包含Vuex、VueRouter等常用配套插件,不包括组件的业务逻辑
路由测试有三种方法:
- 使用了 router-link 或 router-view 的组件可以使用stub,但是一般项目都是编程式导航,因此使用第2种和第3种方式较好
1
2
3
4
5
| import { shallowMount } from '@vue/test-utils'
shallowMount(Component, {
stubs: ['router-link', 'router-view']
})
|
- 引入要测试路由的组件,并创建一个真正的路由实例
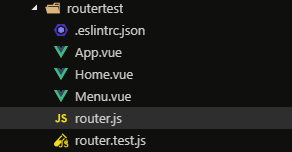
如图,路由中有两个组件,App.vue是根组件
1
2
3
4
5
6
7
8
9
10
11
12
13
14
15
|
import Vue from 'vue';
import VueRouter from 'vue-router';
import Home from './Home.vue';
import Menu from './Menu.vue';
const routes = [
{ name: 'Home', path: '/Home', component: Home },
{ name: 'Menu', path: '/Menu', component: Menu }
];
Vue.use(VueRouter);
export default new VueRouter({ routes });
|
1
2
3
4
5
6
7
8
9
10
11
12
13
14
15
16
17
18
19
20
21
|
import { mount, createLocalVue } from '@vue/test-utils';
import VueRouter from 'vue-router';
import App from './App';
import Home from './Home';
import Menu from './Menu';
import router from './router';
const localVue = createLocalVue();
localVue.use(VueRouter);
describe('router', () => {
it('App router test', () => {
const wrapper = mount(App, { localVue, router });
router.push({ name: 'Menu' });
expect(wrapper.find(Menu).exists()).toBe(true);
router.push({ name: 'Home' });
expect(wrapper.find(Home).exists()).toBe(true);
expect(wrapper.vm.$route.name).toBe('Home');
});
});
|
- 伪造 $route 和 $router
如下,mock所需组件,并添加相关参数,检查最终结果是否符合预期
1
2
3
4
5
6
7
8
9
10
11
12
13
14
15
16
17
18
19
20
21
22
23
24
25
26
27
28
29
30
31
32
33
34
35
36
37
38
39
40
41
42
43
44
45
46
47
48
49
50
51
52
53
54
55
56
57
58
|
import { shallowMount, mount, createLocalVue } from '@vue/test-utils';
import VueRouter from 'vue-router';
import App from './App';
import Home from './Home';
import Menu from './Menu';
jest.mock('./Home', () => ({
name: 'Home',
render: h => h(
'div',
{
class: {
show: true
},
attrs: {
id: 'txt'
}
},
'i\'m render text'
)
}));
const routes = [
{ name: 'Home', path: '/Home', component: Home },
{ name: 'Menu', path: '/Menu', component: Menu }
];
const router = new VueRouter({ routes });
const localVue = createLocalVue();
localVue.use(VueRouter);
describe('router', () => {
it('App router test', () => {
const wrapper = mount(App, { localVue, router });
router.push({ name: 'Menu' });
expect(wrapper.find(Menu).exists()).toBe(true);
router.push({ name: 'Home' });
expect(wrapper.find(Home).exists()).toBe(true);
expect(wrapper.find('#txt').text()).toBe('i\'m render text');
expect(wrapper.vm.$route.name).toBe('Home');
});
});
describe('Menu mock router', () => {
it('renders a username from query string', () => {
const username = 'alice';
const wrapper = shallowMount(Menu, {
mocks: {
$route: {
params: { username }
}
}
});
expect(wrapper.find('.username').text()).toBe(username);
});
});
|
增加快照
当你的组件达到理想状态并测试无误后,可以将当前状态保存为一个快照,这样后面再有改动就可以跟这个快照对比,可以大大提高测试的速度。
1
2
3
4
5
6
7
8
9
10
11
12
13
|
describe('vue组件测试', () => {
beforeEach(() => {
wrapper = mount(hello);
});
afterEach(() => {
vm && vm.$destroy();
wrapper && wrapper.destroy();
});
it('snaps', () => {
expect(wrapper.element).toMatchSnapshot();
})
})
|
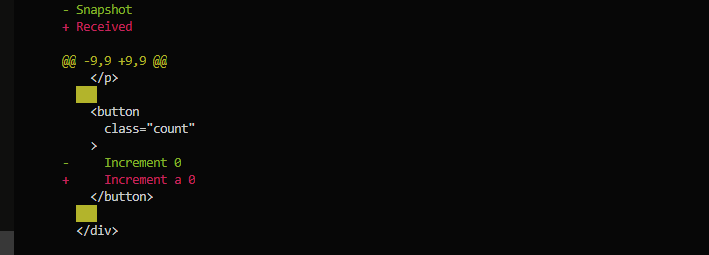
设置好快照,下次有更改的东西直接会提示出来:
更新快照可以用:
常用测试项
- 检测Dom
1
2
3
4
5
6
| it('renders a div', () => {
expect(wrapper.contains('div')).toBe(true);
});
it('p标签的内容是I\'m jest demo', () => {
expect(wrapper.find('.text').text()).toEqual('I\'m jest demo');
});
|
- 检测类名
1
2
3
4
5
| it('check classes', () => {
const checkButton = wrapper.find('.check-box');
expect(checkButton.classes()).toContain('is-checked');
expect(checkButton.classes().indexOf('checked') === -1).toBe(true);
});
|
- 检测样式
1
2
3
4
| it('传递的颜色应该是#fff', () => {
const icon = wrapper.find('.icon');
expect(icon.element.style.color).toEqual('rgb(255, 255, 255)');
});
|
- 检测方法有没有被调用
1
2
3
4
5
6
7
8
9
10
| it('click', () => {
const checkButton = wrapper.find('.check-box');
checkButton.trigger('click');
expect(wrapper.emitted().input.length).toBe(1);
expect(wrapper.emitted().input[0]).toBeTruthy();
expect(wrapper.emitted().input[0]).toEqual([0]);
expect(checkButton.classes()).toContain('is-checked');
checkButton.trigger('click');
expect(wrapper.emitted().input.length).toBe(2);
});
|
1
2
3
4
5
6
7
| it('triggle', () => {
const shallowWrapper = wrapper(Header);
const eventSpy = sinon.spy(wrapper.vm, '$emit');
wrapper.find('.gree-header-title').trigger('click');
expect(eventSpy.withArgs('on-click-title').calledOnce).toBeTruthy();
});
});
|
- 检测传入的数据有没有正常接收
挂载组件时传入一组虚拟数据,根据传入的内容和得到的结果验证逻辑处理是否正确:
1
2
3
4
5
6
7
8
9
| it('The text of check-box should be something, () => {
const shallowWrapper = shallowMount(box, {
slots: {
default: 'something'
}
})
expect(shallowWrapper.find('.check-box').text()).toBe('something');
shallowWrapper.destroy();
});
|
常用API
jest
1
2
3
4
5
6
7
8
9
10
11
12
13
14
15
16
17
18
19
20
21
22
23
24
25
26
27
28
29
30
31
32
33
34
35
36
37
38
39
40
41
42
43
44
45
46
47
48
49
50
51
|
descrip('title', () => {
it('test1', ()=>{
})
it('test2', ()=>{
})
})
beforeEach(fn, timeout)
afterEach(fn, timeout)
beforeAll(fn, timeout)
beforeAll(() => console.log('global - beforeAll'));
afterAll(() => console.log('global - afterAll'));
beforeEach(() => console.log('global - beforeEach'));
afterEach(() => console.log('global - afterEach'));
test('', () => console.log('global - test'));
describe('Scoped / Nested block', () => {
beforeAll(() => console.log('Scoped - beforeAll'));
afterAll(() => console.log('Scoped - afterAll'));
beforeEach(() => console.log('Scoped - beforeEach'));
afterEach(() => console.log('Scoped - afterEach'));
test('', () => console.log('Scoped - test'));
});
describe(name, fn)
test(name, fn, timeout)
it(name, fn, timeout)
test.each(table)(name, fn, timeout)
test.each([[1, 1, 2], [1, 2, 3], [2, 1, 3]])(
'.add(%i, %i)',
(a, b, expected) => {
expect(a + b).toBe(expected);
},
);
|
1
2
3
4
5
6
7
8
9
10
11
12
13
14
| expect(fn()).toBe(value)
expect.extend(matchers)
expect.extend({
matchers() {
return true;
},
});
it('numeric ranges', () => {
expect(100).matchers().toBe(true);
});
expect().toBeTruthy()
expect().toEqual()
|
1
2
3
4
5
6
| jest.fn()
const returnsTrue = jest.fn(() => true);
returnsTrue();
console.log(returnsTrue());
expect(returnsTrue).toHaveBeenCalled();
|
1
2
3
4
5
6
7
8
9
10
11
12
13
14
15
16
17
18
| jest.mock(moduleName, factory, options)
function sum() {
return 88;
}
module.exports = sum;
const sum = require('./sum.js');
jest.mock('./sum.js', () => jest.fn(() => 66));
describe('sum', () => {
it('sum should return 66', () => {
console.log(sum());
expect(sum()).toBe(66);
});
});
|
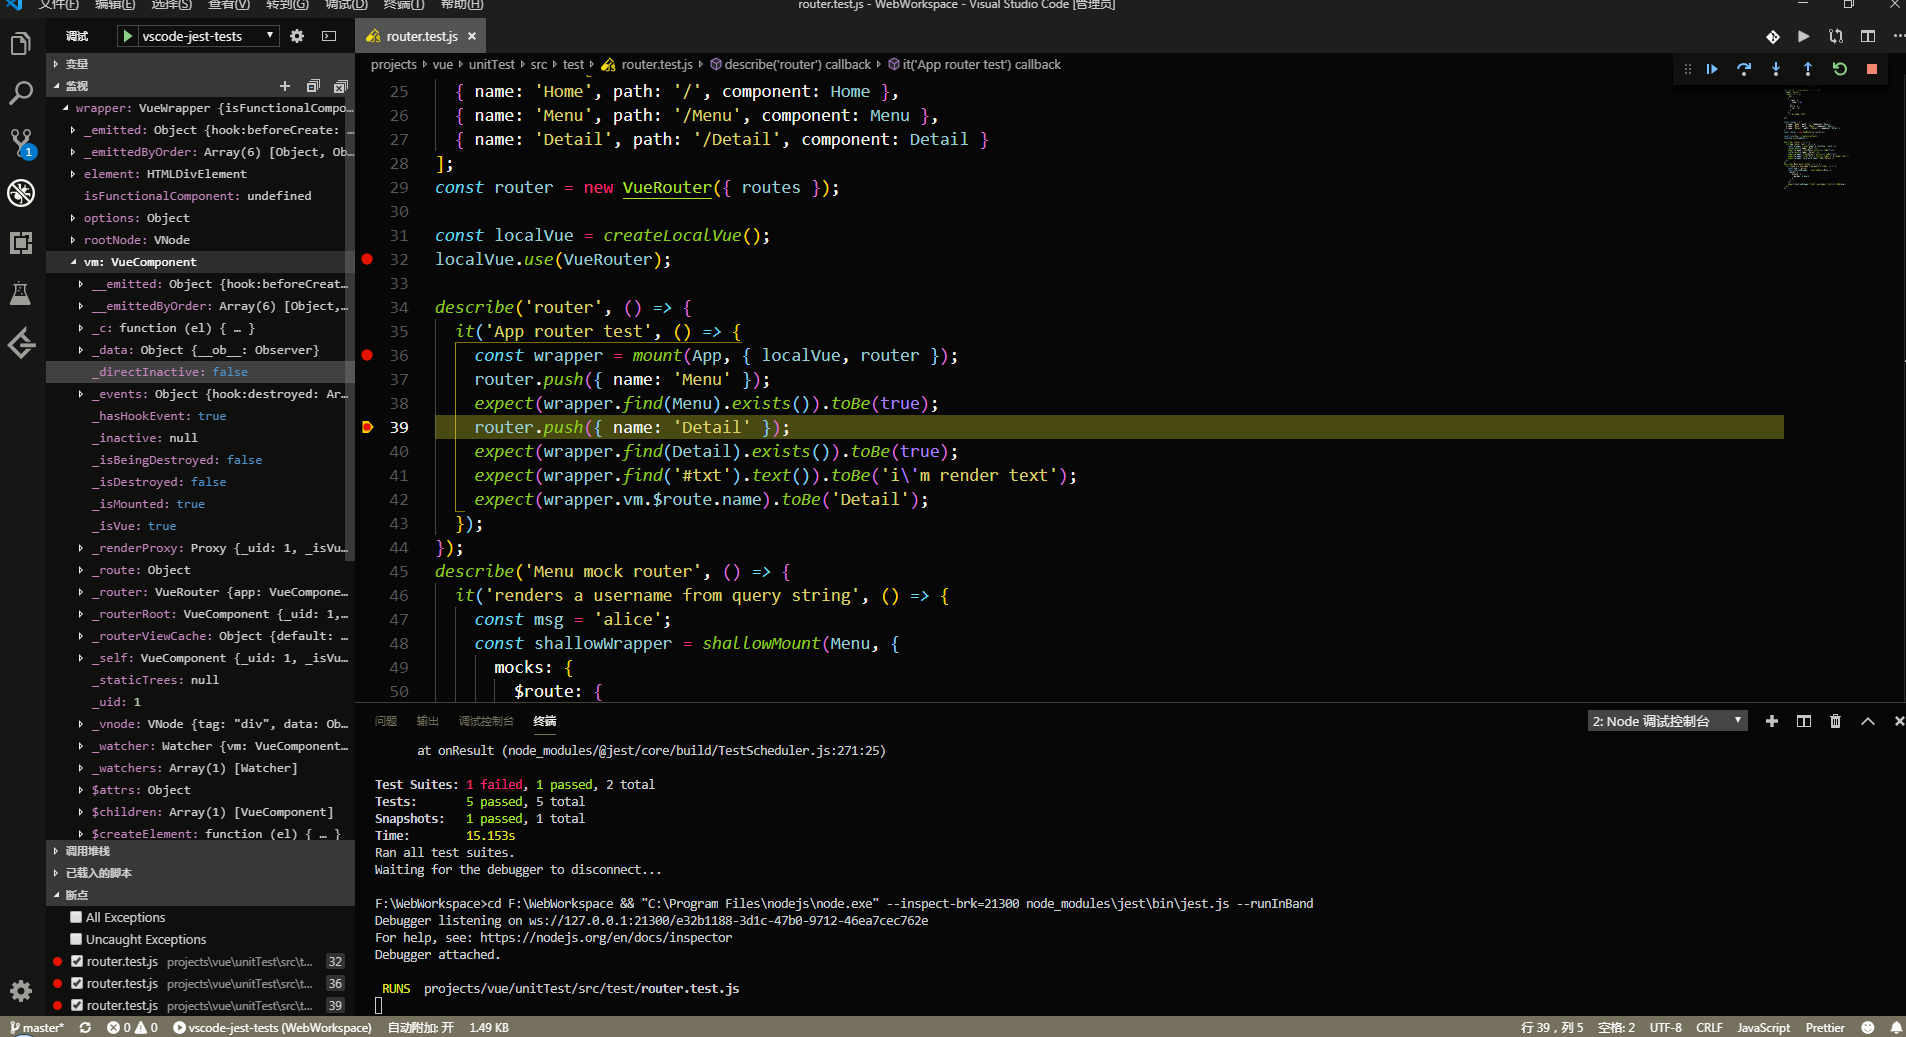
Debug
vscode有jest插件,安装后可以快速开启debug。debug环境是在node下的,也可以自己配置:
1
2
3
4
5
6
7
8
9
10
11
12
13
14
15
16
17
| {
"version": "0.2.0",
"configurations": [
{
"type": "node",
"name": "vscode-jest-tests",
"request": "launch",
"args": [
"--runInBand"
],
"cwd": "${workspaceFolder}",
"console": "integratedTerminal",
"internalConsoleOptions": "neverOpen",
"program": "${workspaceFolder}/node_modules/jest/bin/jest"
}
]
}
|
配置好后设置断点,按F5即可。